

tags:
  - monai
  - medical
library_name: monai
license: apache-2.0
Model Overview
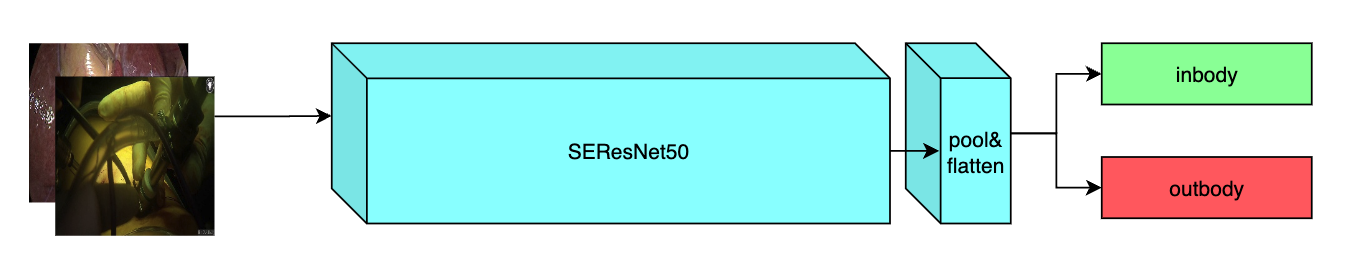
A pre-trained model for the endoscopic inbody classification task and trained using the SEResNet50 structure, whose details can be found in [1]. All datasets are from private samples of Activ Surgical. Samples in training and validation dataset are from the same 4 videos, while test samples are from different two videos.
The PyTorch model and torchscript model are shared in google drive. Modify the bundle_root parameter specified in configs/train.json and configs/inference.json to reflect where models are downloaded. Expected directory path to place downloaded models is models/ under bundle_root.
Data
The datasets used in this work were provided by Activ Surgical.
We've provided a link of 20 samples (10 in-body and 10 out-body) to show what this dataset looks like.
Preprocessing
After downloading this dataset, python script in scripts folder named data_process can be used to generate label json files by running the command below and modifying datapath to path of unziped downloaded data. Generated label json files will be stored in label folder under the bundle path.
python scripts/data_process.py --datapath /path/to/data/root
By default, label path parameter in train.json and inference.json of this bundle is point to the generated label folder under bundle path. If you move these generated label files to another place, please modify the train_json, val_json and test_json parameters specified in configs/train.json and configs/inference.json to where these label files are.
The input label json should be a list made up by dicts which includes image and label keys. An example format is shown below.
[
    {
        "image":"/path/to/image/image_name0.jpg",
        "label": 0
    },
    {
        "image":"/path/to/image/image_name1.jpg",
        "label": 0
    },
    {
        "image":"/path/to/image/image_name2.jpg",
        "label": 1
    },
    ....
    {
        "image":"/path/to/image/image_namek.jpg",
        "label": 0
    },
]
Training configuration
The training as performed with the following:
- GPU: At least 12GB of GPU memory
- Actual Model Input: 256 x 256 x 3
- Optimizer: Adam
- Learning Rate: 1e-3
Input
A three channel video frame
Output
Two Channels
- Label 0: in body
- Label 1: out body
Performance
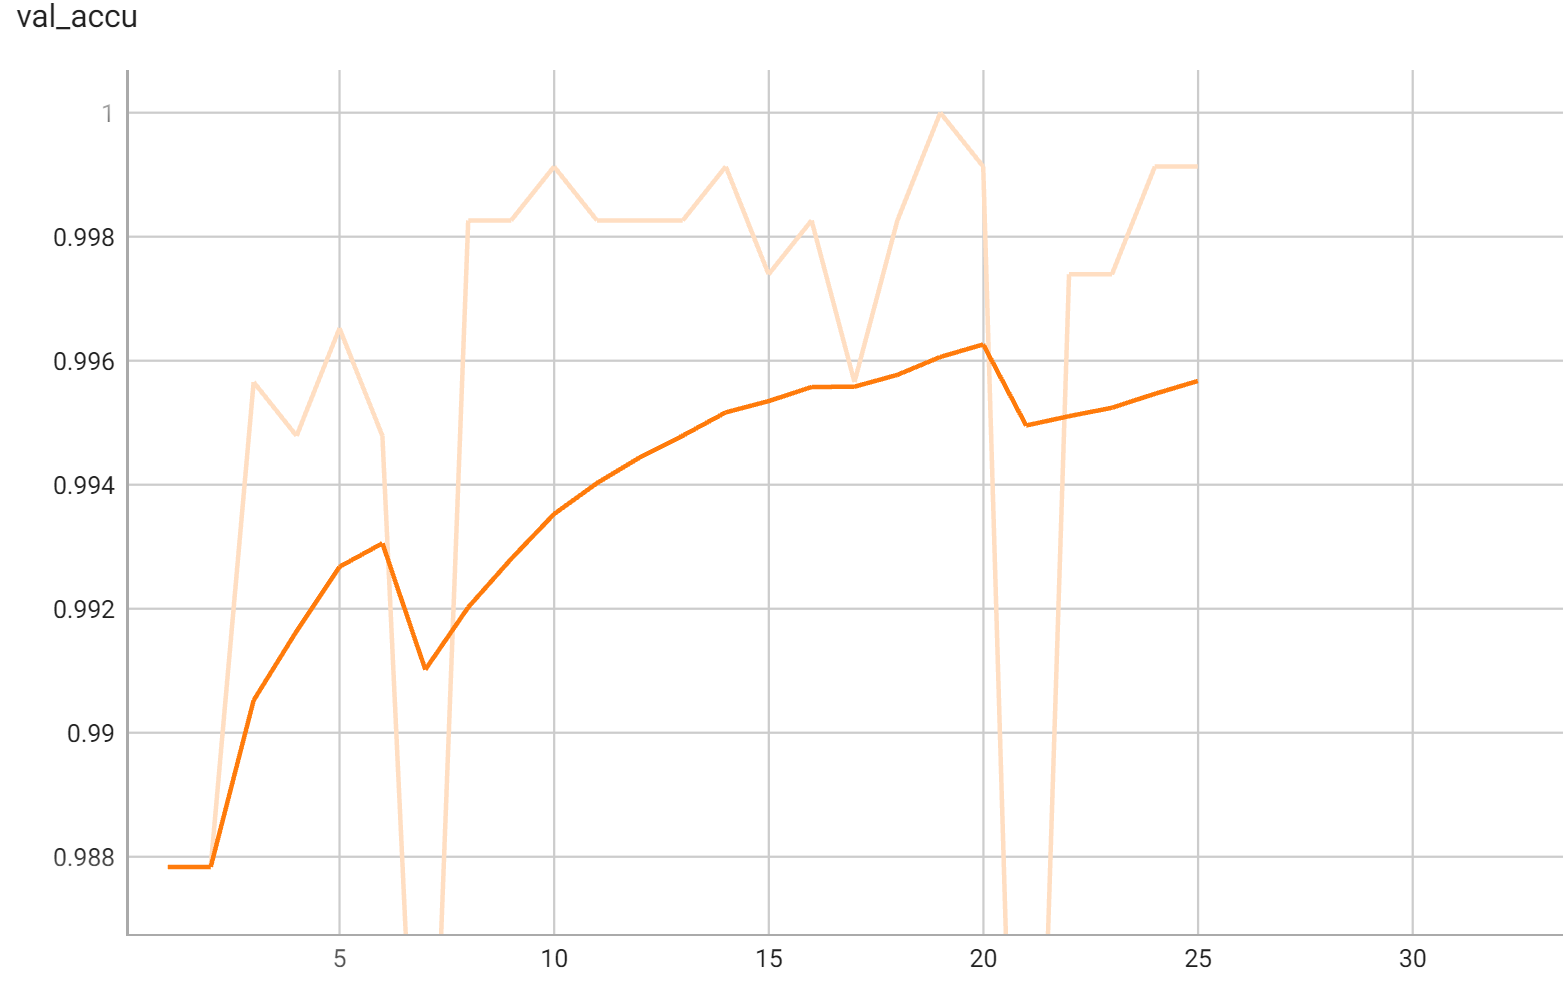
Accuracy was used for evaluating the performance of the model. This model achieves an accuracy score of 0.98
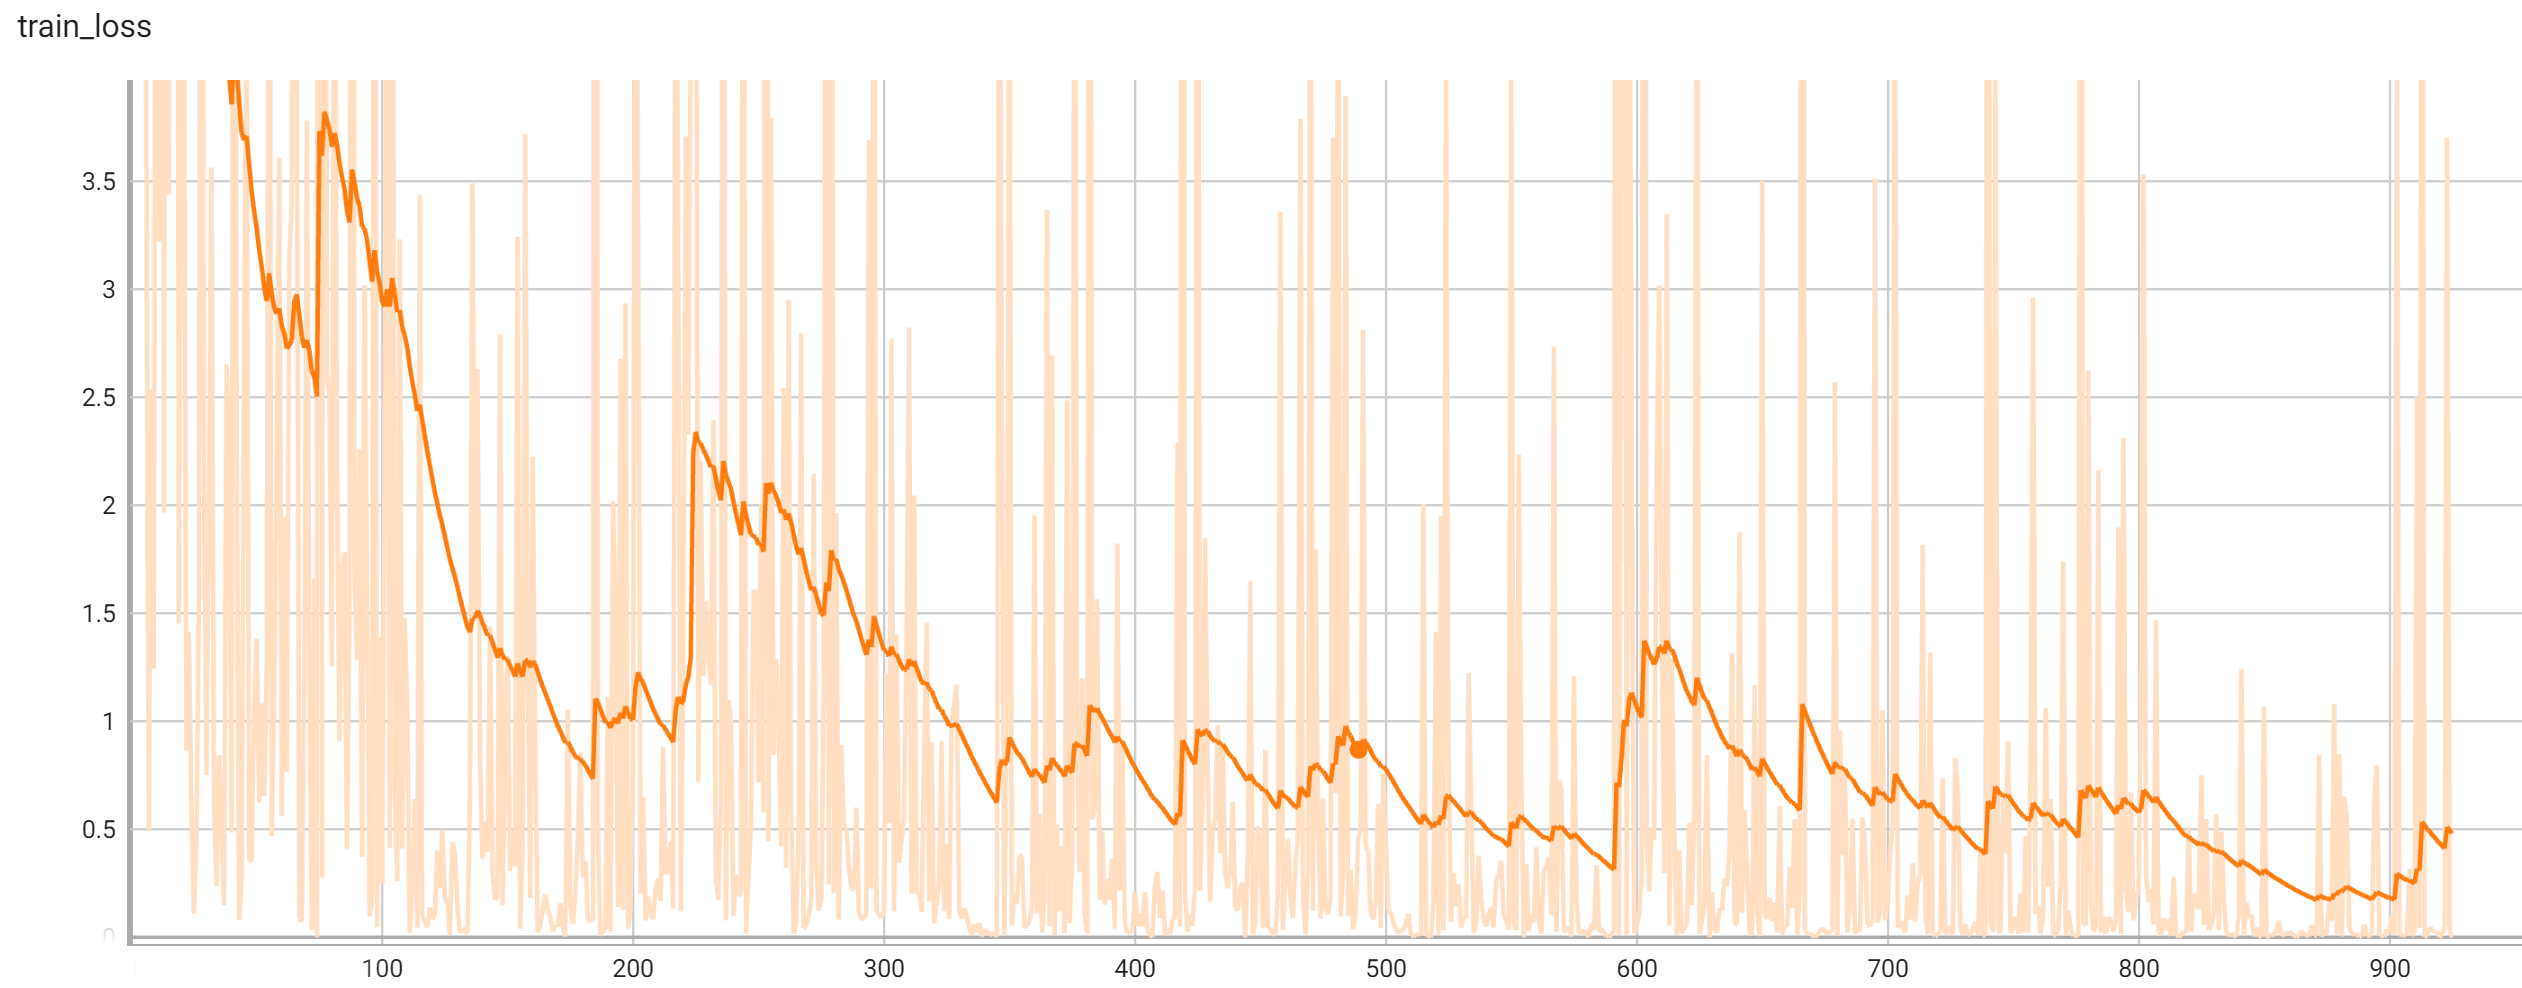
Training Loss
Validation Accuracy
MONAI Bundle Commands
In addition to the Pythonic APIs, a few command line interfaces (CLI) are provided to interact with the bundle. The CLI supports flexible use cases, such as overriding configs at runtime and predefining arguments in a file.
For more details usage instructions, visit the MONAI Bundle Configuration Page.
Execute training:
python -m monai.bundle run training \
    --meta_file configs/metadata.json \
    --config_file configs/train.json \
    --logging_file configs/logging.conf
Override the train config to execute multi-GPU training:
torchrun --standalone --nnodes=1 --nproc_per_node=2 -m monai.bundle run training \
    --meta_file configs/metadata.json \
    --config_file "['configs/train.json','configs/multi_gpu_train.json']" \
    --logging_file configs/logging.conf
Please note that the distributed training-related options depend on the actual running environment; thus, users may need to remove --standalone, modify --nnodes, or do some other necessary changes according to the machine used. For more details, please refer to pytorch's official tutorial.
In addition, if using the 20 samples example dataset, the preprocessing script will divide the samples to 16 training samples, 2 validation samples and 2 test samples. However, pytorch multi-gpu training requires number of samples in dataloader larger than gpu numbers. Therefore, please use no more than 2 gpus to run this bundle if using the 20 samples example dataset.
Override the train config to execute evaluation with the trained model:
python -m monai.bundle run evaluating \
    --meta_file configs/metadata.json \
    --config_file "['configs/train.json','configs/evaluate.json']" \
    --logging_file configs/logging.conf
Execute inference:
python -m monai.bundle run evaluating \
    --meta_file configs/metadata.json \
    --config_file configs/inference.json \
    --logging_file configs/logging.conf
The classification result of every images in test.json will be printed to the screen.
Export checkpoint to TorchScript file:
python -m monai.bundle ckpt_export network_def \
    --filepath models/model.ts \
    --ckpt_file models/model.pt \
    --meta_file configs/metadata.json \
    --config_file configs/inference.json
References
[1] J. Hu, L. Shen and G. Sun, Squeeze-and-Excitation Networks, 2018 IEEE/CVF Conference on Computer Vision and Pattern Recognition, 2018, pp. 7132-7141. https://arxiv.org/pdf/1709.01507.pdf
License
Copyright (c) MONAI Consortium
Licensed under the Apache License, Version 2.0 (the "License"); you may not use this file except in compliance with the License. You may obtain a copy of the License at
http://www.apache.org/licenses/LICENSE-2.0
Unless required by applicable law or agreed to in writing, software distributed under the License is distributed on an "AS IS" BASIS, WITHOUT WARRANTIES OR CONDITIONS OF ANY KIND, either express or implied. See the License for the specific language governing permissions and limitations under the License.